Back to Terrain Module
Exporting a LandXML Surface File from Civil 3D to Terrain
Updated August 22, 2019
This article applies to:
- Terrain 3D
- Terrain Forestry
- RoadEng Civil
- RoadEng Forestry
- Softree Optimal
Download the files for the example HERE
(Note: it is a .zip file, you will need to save and extract the files first)
Open Civil 3D and follow the below steps:
- Open the attached file, Road Surface.dwg.
- To export a LandXML surface from Civil 3D, Select output tab and then in the export tab select Export to LandXML button.
- In the Export to LandXML window check Road surface, choose the 1.2 version and press OK.
- In the new window write EX.xml for the new file name.
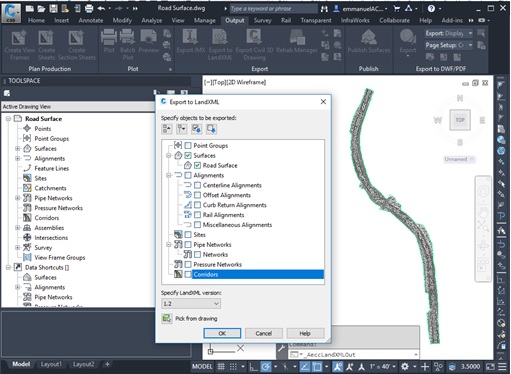
Figure 1 – Exporting a LandXML file from Civil 3D
Follow below steps for importing the LandXML file in the Terrain Module.
- Start Terrain Module, select File | Open.
- Browse to find the LandXML file (EX.xml). In the Import Options window select the Road Surface as a TIN Surface and check both items and click OK.
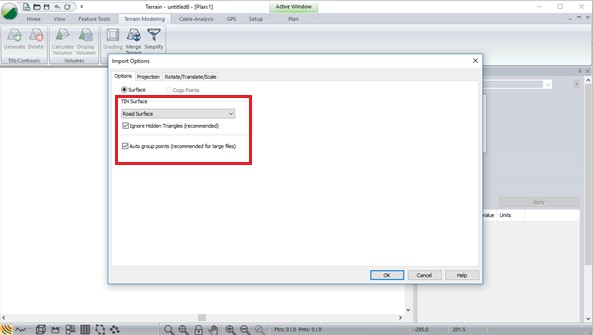
Figure 2 – Import Options window in the Terrain Module
Nodes should now be displayed.
- Then in the Terrain Modeling tab click on Generate TIN button. Note that the calculate triangles item should not be checked otherwise all break lines from Civil 3D file will be deleted in the surface.
- Click OK and then click on Activate 3D Window located in the bottom Status Bar. Now the rendered surface should be visible; if it is not, press Zoom Extents in the View tab of the toolbar.
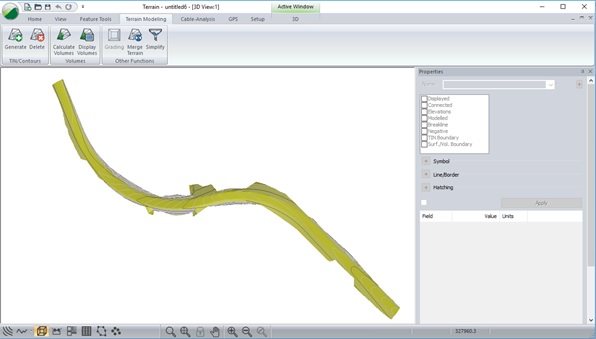
Figure 3 – 3D view of the surface from the LandXML file
Several surfaces could be imported into the Terrain Module as well.